```{r}
#| label: my-nice-label
# This is a regular comment.
```Introduction to Quarto
Creating a new Quarto file in RStudio
Navigate to File > New File > Quarto Document.
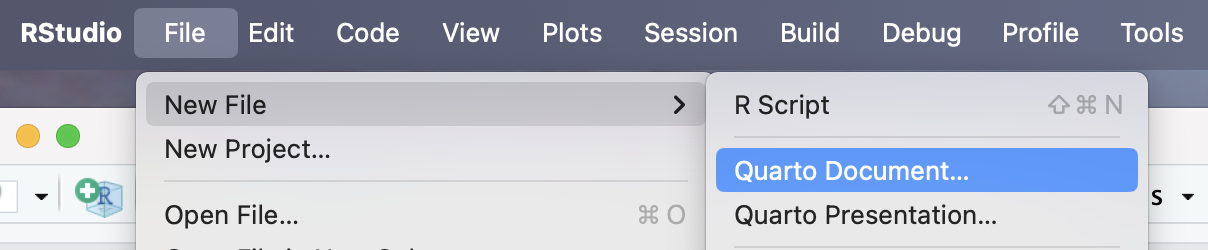
From there, you will see a menu like this one.
You have several options here.
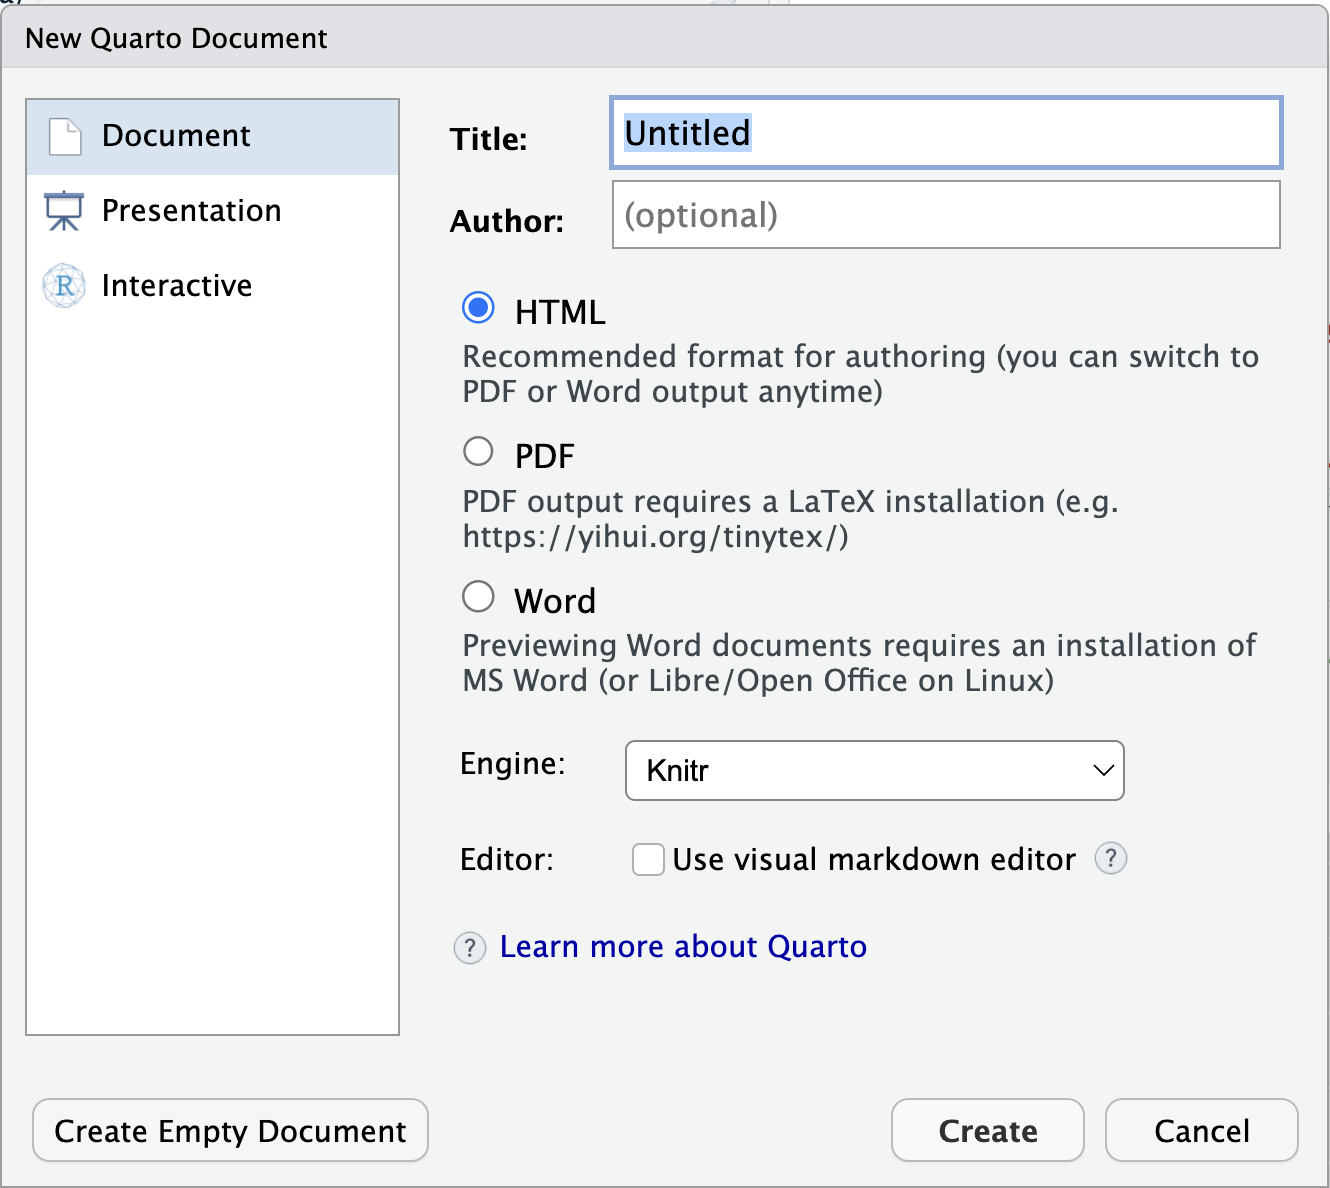
If you fill in the title and author and hit
you will get the built-in template document with your title and author information inserted. If you select
, you will get a blank document. This is mainly useful if you are already familiar with Quarto and want to start from scratch, or if you know you will be deleting the contents and pasting in a template document in a moment anyway. As you can see, there are also options for various types of documents. Feel free to experiment with these, but mainly we will start from the default (HTML) and change the format to
typstlater if we want to generate a PDF.You can choose to launch with the visual editor here, but note
You can easily toggle between source and visual editors once you have the Quarto file open, and
If you are going to copy and paste in a template document, you will want to be in source mode for that step.
If you accept all the defaults and click
, you will see a document that looks like this: 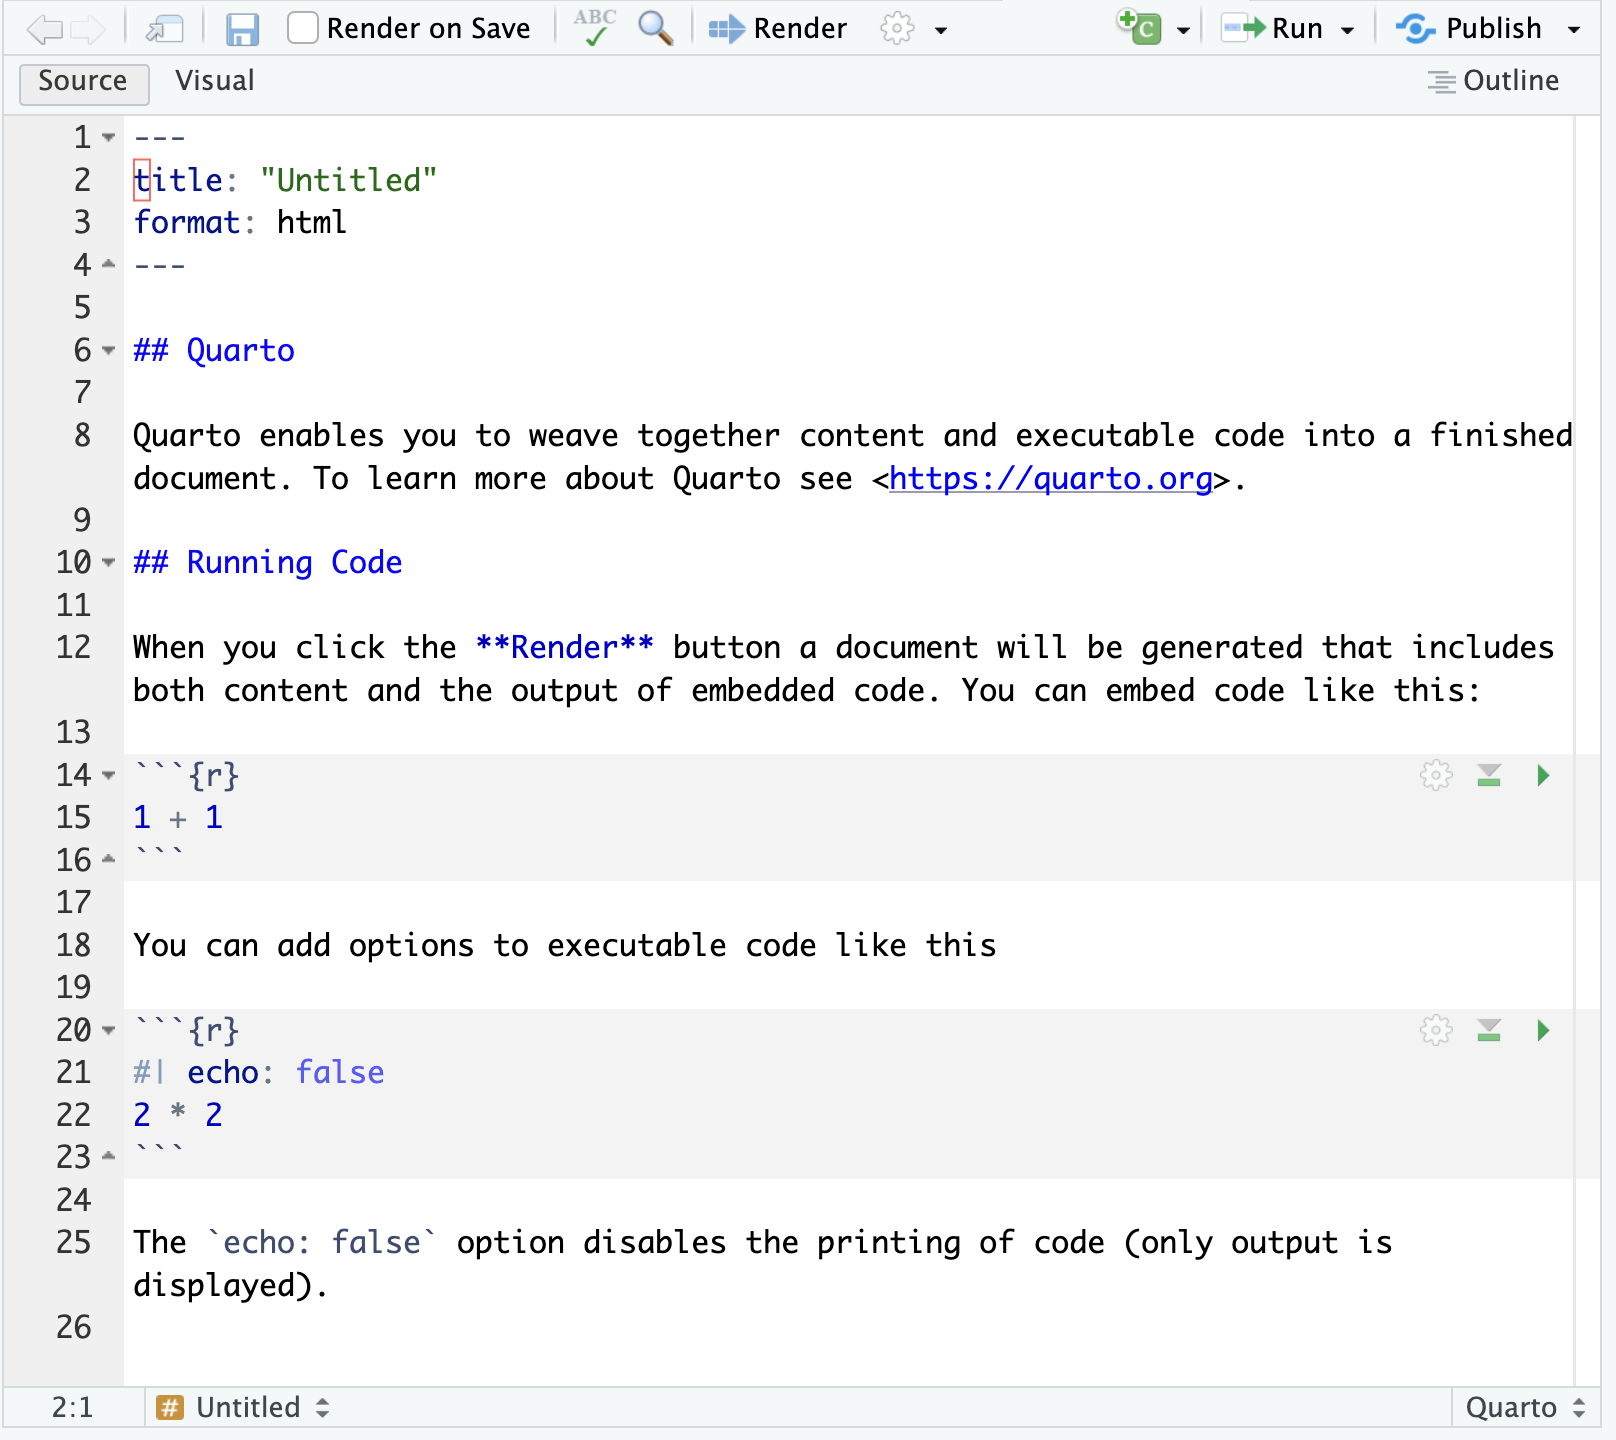
Things to notice:
In the bottom right corner you should shee the word “Quarto”, indicating that RStudio knows you are working with a quarto document.
Just above the file you will see the toggle for source vs. visual editor.
Above that you will see a menu of options, the most important of which is “Render”, which is used to process your file into its output format. Go ahead and click that now if you like to see the rendered version of your Quarto document.
Congratulations, you have created a Quarto document.
Working from a different template document
If you are provided a template document, there are two ways to use it.
You can save the file (with the .qmd extension) and open the file to begin editing it.
You can copy the contents of the template document and then paste the contents into your existing document.
:::{.callout-warning} ### Make sure you are using the Source Editor when pasting.
You can switch back to Visual Editor if you like after pasting. :::
Editing a Quarto document
Quarto documents have 3 types of sections or blocks:
The YAML header.
This is the top few lines of the document, surrounded by
---.This section defines things like the title, author, format, and various other settings that apply to your document.
Edit the YAML header with careIf there is a syntax error in the YAML header, the document will not render. If you get into this situation, here are three ways to fix things.
Edit the YAML header yourself if it is clear what the problem is.
Copy the YAML header from a different document to replace the YAML header of the current document (and then make any edits that are necessary)
Start a new document and paste in the contents (but not the YAML header) from your document with the broken YAML header.
Text blocks.
These have a white background and allow you to type text as you would in a Word or Google doc. If you use the visual editor, you will see some formatting options similar to other word processors you have used. In the source editor, you will indicate formatting using markup – things you type directly into the document that are interpreted as formatting.
Headers are indicated with a line that begins with some number of pound signs followed by a space:
#,##,###, etc.Surround text with asterisks (
*) or underscores (_) to indicate italics.Surround text with two asterisks (
**) or underscores (__) to indicate bold.Surround text with dollar signs (
$) to indicate mathematical notation.Help with mathematical notationFor more about mathematical notation see this document.
No spaces allowedFor the last three of of these, there must not be a space between the marker (
*,_,$) and the text it surrounds.You can create bulleted lists using
*or-.
Use indentation to indicate nesting.You can create enumerated lists using
1.,a.etc. Use indentation to indicate nesting.
TipIf you aren’t sure just how to do something, try switching to the visual editor and using the menu options there. Then switch back to the source editor to see how it was done.
Code chunks.
R code chunks begin ```
{r}and end with three backticks. They are indicated in the editor with a gray background.In these sections you can type R code. This code will be executed when you render the document and (by default) both the R code and the results of executing it will be displayed in your rendered document.
You can type the beginning and ending of the chunks yourself, or you can click on the green square with the letter C in it to insert a new code chunk at your cursor location.
That’s about all there is to a basic Quarto document. For fancier things, see the documentaiton at quarto.org.
Some tips
If a template document is provided, use it.
Put text in text blocks, not in code comments.
Code comments should be used for commenting code, not for introducing or discussing the results.
Quarto documents must be self-contained.
In order for the R code to execute, all the information required must be in the quarto document. This includes things like loading packages and data sets, defining variables you use, etc.
You can run individual R chunks by pressing “play button” at the top of the chunk.
This can be useful when you are working on an individual R section and don’t want to re-render the entire document each time you make a change.
The play button runs code in the consoleWhen the document is rendered, it does not have access to your console. If code runs in your console but not when you render your document, it is most likely because you have forgotten to include in your document some code that you ran in the console.
If you label your R chunks, it is easier to tell where any problems are.
If you do not label them, you will see “unnamed-chunk-1”, “unnamed-chunk-2”, etc. as the document is rendered. You can give your chunks nicer names like this. (Notice the special comment indicator
#|.)